Centurion Action X
Centurion Action X
6,100,000  Cost Cost |
| 1950 390 HP Hit Points |
| 55/60 27.62/60 t Weight Limit |
| 1040 1040 hp Engine Power |
| 53/20 km/h Speed Limit |
| 50 50 deg/s Traverse |
| 18.91 37.65 hp/t Power/Wt Ratio |
| Yes Yes Pivot |
Shell Cost
Reload Times
Nominal: 8.6 s
50% Crew: 10.65 s
75% Crew: 9.3 s
100% Crew: 8.25 s
Rammer: 7.43 s
Vents: 8.07 s
Both: 7.26 s
Both and BiA: 7.1 s
Both and Max Crew %: 6.81 s
See Crew, Consumables, or Equipment for more information.
Reload Times
Nominal: 8.6 s
50% Crew: 10.65 s
75% Crew: 9.3 s
100% Crew: 8.25 s
Rammer: 7.43 s
Vents: 8.07 s
Both: 7.26 s
Both and BiA: 7.1 s
Both and Max Crew %: 6.81 s
See Crew, Consumables, or Equipment for more information.
Using Shell Type 1 (390 Damage):
Theoretical Damage Per Minute
Nominal DPM: 2722.2
50% Crew: 2195.7
75% Crew: 2515.5
100% Crew: 2839.2
100% Crew
Vents: 2901.6
Rammer: 3155.1
Both: 3225.3
Both and BiA: 3295.5
Both and Max Crew %: 3439.8
Advantageous Damage Per Minute
First-shot DPM: 3112.2
50% Crew: 2585.7
75% Crew: 2905.5
100% Crew: 3229.2
100% Crew
Rammer: 3545.1
Vents: 3291.6
Both: 3615.3
Both and BiA: 3685.5
Both and Max Crew %: 3829.8
See here, here, or here for more information.
Using Shell Type 2 (390 Damage):
Theoretical Damage Per Minute
Nominal DPM: 2722.2
50% Crew: 2195.7
75% Crew: 2515.5
100% Crew: 2839.2
100% Crew
Vents: 2901.6
Rammer: 3155.1
Both: 3225.3
Both and BiA: 3295.5
Both and Max Crew %: 3439.8
Advantageous Damage Per Minute
First-shot DPM: 3112.2
50% Crew: 2585.7
75% Crew: 2905.5
100% Crew: 3229.2
100% Crew
Rammer: 3545.1
Vents: 3291.6
Both: 3615.3
Both and BiA: 3685.5
Both and Max Crew %: 3829.8
See here, here, or here for more information.
Using Shell Type 3 (480 Damage):
With wholly penetrating hits
Theoretical Damage Per Minute
Nominal DPM: 3350.4
50% Crew: 2702.4
75% Crew: 3096
100% Crew: 3494.4
100% Crew
Vents: 3571.2
Rammer: 3883.2
Both: 3969.6
Both and BiA: 4056
Both and Max Crew %: 4233.6
Advantageous Damage Per Minute
First-shot DPM: 3830.4
50% Crew: 3182.4
75% Crew: 3576
100% Crew: 3974.4
100% Crew
Rammer: 4363.2
Vents: 4051.2
Both: 4449.6
Both and BiA: 4536
Both and Max Crew %: 4713.6
See here, here, or here for more information.
With 50% Crew: 0.396 m
With 75% Crew: 0.346 m
With 100% Crew: 0.307 m
With BiA: 0.3 m
With BiA and Vents: 0.294 m
Maximum possible: 0.281 m
For more details, see Crew
With 50% Crew: 0.396 m
With 75% Crew: 0.346 m
With 100% Crew: 0.307 m
With BiA: 0.3 m
With BiA and Vents: 0.294 m
Maximum possible: 0.281 m
For more details, see Crew
With 50% Crew: 2.601 s
With 75% Crew: 2.271 s
With 100% Crew: 2.014 s
With GLD: 1.831 s
With BiA: 1.969 s
With BiA and Vents: 1.926 s
With both and GLD: 1.751 s
Maximum possible: 1.679 s
For more details, see Crew or Equipment
With 50% Crew: 2.601 s
With 75% Crew: 2.271 s
With 100% Crew: 2.014 s
With GLD: 1.831 s
With BiA: 1.969 s
With BiA and Vents: 1.926 s
With both and GLD: 1.751 s
Maximum possible: 1.679 s
For more details, see Crew or Equipment
With 50% Crew: 322.1 m
With 75% Crew: 366.1 m
With 100% Crew: 410 m
With Recon and Situational Awareness: 430.7 m
With Coated Optics: 451 m
With Binocular Telescope: 512.5 m
Maximum possible: 586.9 m
For more details, see Skills or Equipment
With 50% Crew: 322.1 m
With 75% Crew: 366.1 m
With 100% Crew: 410 m
With Recon and Situational Awareness: 430.7 m
With Coated Optics: 451 m
With Binocular Telescope: 512.5 m
Maximum possible: 586.9 m
For more details, see Skills or Equipment
With 50% Crew: 589.3 m
With 75% Crew: 669.7 m
With 100% Crew: 750 m
With 100% Signal Boost: 900 m
When affected by 100% Relaying: 825 m
Maximum possible: 1079.2 m
For more details, see Skills or Equipment
With 50% Crew: 589.3 m
With 75% Crew: 669.7 m
With 100% Crew: 750 m
With 100% Signal Boost: 900 m
When affected by 100% Relaying: 825 m
Maximum possible: 1079.2 m
For more details, see Skills or Equipment
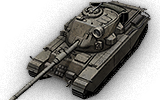
The Centurion Action X is a British tier 10 medium tank.
The Action X turret was planned to be used for later variants of the Centurion tank. One prototype of the turret was mounted on the chassis of the Centurion Mark 7, and another was used for ballistic trials. The vehicles with the Action X turret never entered mass production or saw service.
Replaced the FV4202 in patch 9.12. Hard-hitting medium tank with great aiming time and decent mobility, While Action X turret provides decent protection. But, With its large size, It was vulnerable especially against SPG if you’re not moving around.
The Centurion Action X marks the end of its British medium line.
Modules / Available Equipment and Consumables
Modules

| Tier | Gun | Penetration (mm) | Damage (HP) | Rate of fire (rounds/minute) | Dispersion (m/100m) | Aiming time (s) | Weight (kg) | Price ( ) |
|---|

Engines
| Tier | Engine | Engine Power (hp) | Chance of Fire on Impact (%) | Weight (kg) | Price ( ) |
|---|

Suspensions
| Tier | Suspension | Load Limit (т) | Traverse Speed (gr/sec) | R min | Weight (kg) | Price ( ) |
|---|

Radios
Compatible Equipment


Compatible Consumables
Player Opinion
Pros and Cons
Performance
The Centurion Action X is a significant upgrade from the Centurion 7/1 in every aspect and a further refinement of the play style. It retains the excellent gun depression and powerful L7 gun of its predecessor, but with greatly improved mobility, greater accuracy on the move, and even better turret armour. All this combines to make a tank well suited to the hull-down style of its predecessors, but now with the option for rapid flanking and firing on the move as well. Still, the Centurion Action X does not have the armour to stand up in a prolonged fight against powerful tier 10 guns, even hull down, so making use of the upgraded speed and mobility is essential. However, while the Centurion AX’s upgraded mobility can allow it to brawl if necessary, the Centurion AX is a long range fighter at heart. Its large size coupled with moderate DPM compared with other tier 10 mediums make brawling a dubious proposition at best. The Centurion Action X is best suited for combat on hilly terrain; by making use of its 10 degrees of gun depression, the Centurion Action X can hide its massive lower glacis, and significantly increase its turret armour. When using all ten degrees of gun depression, even weak spots such as a plate just above the gun, or the plate directly below the gun, can reliably bounce shots from most tanks. Though it has an abundance of hitpoints, the Centurion AX is best suited for the second or third line of tanks, supporting the team’s heavies, or playing like a turreted td. Players who love the Centurion 7/1 will find the Centurion AX a most satisfying tank to play, allowing a greater array of play styles due to its good maneuverability, at the expense of a large chassis with mediocre armour.
Centurion Action X

Здравствуйте, Уважаемые пользователи!
Данная тема создана для обсуждения английского среднего танка Centurion Action X.

История:
Программа Centurion Action X предусматривала разработку только башни, шасси использовалось от текущей модификации Centurion. В рамках программы изготовили две башни. Первая, полностью экипированная, была установлена на шасси Centurion Mk.7 и прошла программу ходовых испытаний. Насколько известно, до наших дней эта машина не дожила. Зато дожила вторая башня, построенная для испытаний обстрелом. Она получила минимальные повреждения и ныне демонстрируется на открытой площадке Tank Museum Bovington.
Дальше экспериментов дело по программе Centurion Action X не продвинулось, но бесследно эта активность не прошла. Не сильно печалясь, разработчики башни ее слегка перепроектировали, в результате получилась башня FV4202. Если кто-то будет вам рассказывать, что эти башни сильно отличаются друг от друга, может смело показывать в этого неудачника пальцем, гнать его и насмехаться над ним. Фактически изменения свелись к устранению лючка с левой стороны башни, установке слева нового ящика ЗИП и небольшой переделке кормовой ниши, которая стала немного просторнее. На этом все, лобовая часть и крыша со всем своим оборудованием перекочевала с Centurion Action X без изменений.

Рендеры танка:


Условия замены FV4202 на Centurion Action X
Британский средний танк X уровня FV4202 заменён на новый танк Centurion Action X
При этом FV4202 был полностью перебалансирован и стал премиум танком VIII уровня:
Если FV4202 (105) исследован:
Если FV4202 (105) находится в Ангаре:
Centurion Action X
Back to the main page
Now that you are at the top of the British medium tank line, the Centurion Action X awaits you. Just like its predecessor, the Centurion Mk. 7/1, it comes with a couple of gameplay changes. However, if you enjoyed playing the previous vehicles, this one will not disappoint you.
Gameplay
Looking at the mobility, it again received some minor improvements but this time a slightly better top speed as well as traverse speed. You will get where you need to be in a reasonable time. While its view range has not increased, it’s still one of the best values in Tier X – spotting enemies will be easier than ever before.
The gun is fairly similar to the previous one, with one major difference: it no longer has the high-penetration HESH special shells but HEAT shells for the toughest opponents. Its normal HE shells are pretty strong still, so take some of them with you. Other characteristics are fairly similar to both the previous tank and comparable medium tanks of the same Tier, but the rate of fire is now on a very good level.
Overall, the Centurion Action X is a very versatile vehicle. It may be best-suited for mid-range engagements, but its accuracy allows for long-range shots. Moreover, if needed, it can inflict some hits in close combat. Just make sure to hide your hull if possible.
Equipment
With the first setup, you can look forward to a multitude of improvements to your vehicle’s performance. Faster reload speed, lower dispersion penalties, and Coated Optics ensure that you rack up more damage as well as assisted damage. If you prefer more evenly spread-out bonuses on a multitude of parameters, replace the Coated Optics with an Improved Ventilation.
Crew Skills
| Commander |  |  |  |
|---|---|---|---|
| Gunner | |  | |
| Driver | |  | |
| Loader | |  | |
A usual choice of crew skills and perks. Repair is the most important skill to go for in case your tracks get blown off, while Snap Shot and Smooth Ride increase the chance of hitting your targets on the move. Brothers In Arms tops it off with a nice bonus to the crew’s training level.
Adrenaline Rush
Decreases the gun reload time by 10% if your vehicle’s HP drops below 10%.
Works only if the skill progress has reached 100%.
Brothers in Arms / Sisterhood of Steel
Increases the training level of your crew members by 5%.
Works only if the skill progress has reached 100% for every single crew member.
Band of Brothers
Increases the training level of your crew members by 5%.
Works only if the skill progress has reached 100% for every single crew member.
Also works if other crew members have Brothers in Arms / Sisterhood of Steel.
Call for Vengeance
Reports the enemy vehicles’ location for two more seconds after the destruction of the own vehicle.
Works only if the skill progress has reached 100%.
Clutch Braking
Increases the traverse speed of your vehicle.
The higher the skill progress, the higher the effect.
Concealment
Increases the camouflage value of your vehicle.
The higher the skill progress, the higher the effect.
Controlled Impact
Increases the ramming damage dealt and decreases damage taken by ramming.
The higher the skill progress, the higher the effect.
Deadeye
Increases the chance of landing a critical hit.
Works only if the skill progress has reached 100%.
Designated Target
Keeps targetes vehicles visible for two more seconds.
Works only if the skill progress has reached 100%.
Eagle Eye
Allows you to identify damaged/destroyed modules as well as injured crew members of an enemy vehicle by hovering your mouse over it for several seconds.
Works only if the skill progress has reached 100%.
Firefighting
Reduces the duration and damage taken by fire.
The higher the skill progress, the higher the effect.
Intuition
Grants a slight chance of changing the shell type without having to reload again.
Doesn’t work with autoloaders. Works also while reloading.
Works only if the skill progress has reached 100%.
Jack of All Trades
Reduces the performance penalty of wounded crew members.
The higher the skill progress, the higher the effect.
Mentor
Increases the Crew XP gained for each member apart from the commander.
The higher the skill progress, the higher the effect.
Off-Road Driving
Increases the mobility on medium and soft terrain.
The higher the skill progress, the higher the effect.
Preventative Maintenance
Reduces the chance of taking fire.
Works only if the skill progress has reached 100%.
Recon
Increases the view range of your vehicle.
The higher the skill progress, the higher the effect.
Relaying
Increases the signal range of your allies’ vehicles within your signal range.
The higher the skill progress, the higher the effect.
Repair
Reduces the repair time of destroyed modules.
The higher the skill progress, the higher the effect.
Safe Stowage
Increases the durability of your vehicle’s ammo rack.
Works only if the skill progress has reached 100%.
Signal Boosting
Increases the signal range of your vehicle.
The higher the skill progress, the higher the effect.
Situational Awareness
Increases the view range of your vehicle.
The higher the skill progress, the higher the effect.
Sixth Sense
Shows a lightbulb three seconds after you’ve been spotted.
Works only if the skill progress has reached 100%.
Smooth Ride
Reduces the dispersion penalty while driving.
The higher the skill progress, the higher the effect.
Snap Shot
Reduces the dispersion penalty of traversing the turret.
The higher the skill progress, the higher the effect.
Additional Grousers
Increases the mobility on soft and medium terrain.
Binocular Telescope
Increases the view range of your vehicle by 25%.
Your hull must stand still for at least 3 seconds.
Camouflage Net
Increases the camouflage value of your vehicle tremendously.
Your hull must stand still for at least 3 seconds.
Enhanced Gun Laying Drive
Reduces the aiming time of your gun by 10%.
Coated Optics
Increases the view range of your vehicle by 10%.
Tank Gun Rammer
Reduces the reload time of your gun by 10%.
Spall Liner
Decreases damage taken by ramming and high-explosive splash.
Toolbox
Decreases the repair time of destroyed modules.
Cumulative with the Repair skill.
Improved Ventilation
Increases the training level of your crew members by 5%.
Vertical Stabilizer
Reduces the dispersion penalties of hull and turret traverse, as well as driving by 20%.